Icebismuth (talk | contribs) No edit summary Tag: Visual edit |
(some refinement) Tag: Visual edit |
||
| (33 intermediate revisions by 3 users not shown) | |||
| Line 1: | Line 1: | ||
| − | {{LocationInfobox|name=Sunken City|image=File: |
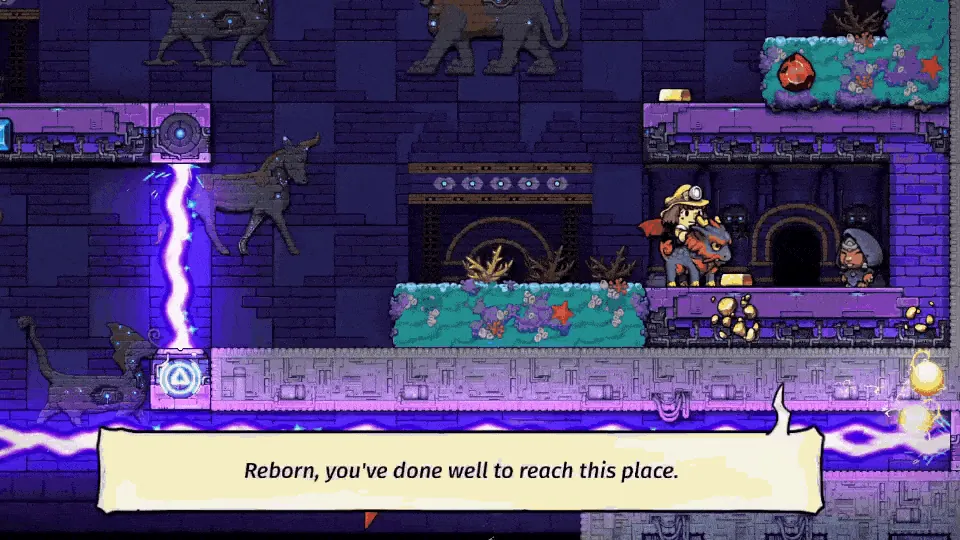
+ | {{LocationInfobox|name=Sunken City|image=File:SunkenCityHD.png|accessible=Levels 7-1 to 7-3|main dangers=[[Frog Trap]], [[Arrow Trap]], [[Goliath Frog]], [[Regenerating Block]]|caption=[[Journal|Places Entry 13]]: In the bottom of the Well, the First City sleeps.}} |
| + | __NOTOC__ |
||
| − | The Sunken City is the secret seventh world in Spelunky 2. It is accessed by acquiring the [[Qilin]] by taking the correct [[Ushabti]] to 6-2. When bringing the Qilin to [[Tiamat's Throne|Tiamat's throne]], use it to fly up through many timed lasers and spark traps. If you succeed you will find Tun beside a door congratulating you for your progress. Through the door is an Olmec-shaped rocket ship which will take you to the first level of Sunken city. Note: The door is only one tile tall, so you can't bring the Qilin with you to the sunken city. |
||
| + | <div style="background: #F7F1D4; border: 1px solid #BCAC87; width: 200px"> |
||
| + | <div style="text-align: left;">Contents<span style="font-size: 10px;" class="mw-collapsible mw-expanded" data-expandtext="Show" data-collapsetext="Hide"><ol style="text-align: left; font-size: 14px;"> |
||
| + | <li>[[#Geography|Geography]]</li> |
||
| + | <ol> |
||
| + | <li>[[#Mother Statue|Mother Statue]]</li> |
||
| + | <li>[[#Waddler's Cave|Waddler's Cave]]</li> |
||
| + | <li>[[#Sun Challenge|Sun Challenge]]</li> |
||
| + | <li>[[#Goliath Frogs|Goliath Frogs]]</li> |
||
| + | </ol> |
||
| + | <li>[[#Enemies|Enemies]]</li> |
||
| + | <li>[[#Traps|Traps]]</li> |
||
| + | <li>[[#Reaching the Sunken City|Reaching the Sunken City]]</li> |
||
| + | </ol></span></div></div> |
||
| + | The Sunken City is the secret seventh world in Spelunky 2. It is accessed by riding the [[Qilin]] up [[Tiamat's Throne|Tiamat's throne]] and reaching the [[Olmec]] spaceship. |
||
| ⚫ | |||
| + | [[File:Spelunky 2 OST - Sunken City - Bottom of the well.mp3|thumb|Sunken City Music]]The Sunken City is loosely based off of the Lovecraftian city of R'yleh, and reflects that in its appearance. It is a "reverse" world, where the player starts at the bottom of each level, and makes it to the level exit found at the top. The gravity of [[water]] is also flipped here, as it will fall upwards. |
||
| + | Many of the enemies here are seemingly much less dangerous than what the player previously encountered, as most of them simply approach the player and deal only 1 HP. The real hazard that Sunken City enemies pose is the large amount of time that the player is faltered after being hit by them, which could lead them to their doom into [[Spikes]] or [[Regenerating Block|Regenerating Blocks]]. |
||
| − | The sun challenge will spawn in 7-1, 7-2 or 7-3 which is another challenge hosted by [[Tun]]. Note that she sun challenge is dangerous and it is highly likely to die if you participate. The sun challenge consists of a narrow room with frog traps, laser barriers, and enemy spawners. The goal of the challenge is to survive a barrage of enemies for a limited time. When the time is up, noted by the text on the bottom telling you when there are 5 seconds left. After you survive the challenge you can pick up the arrow of light from a platform in the middle of the arena protected by timed lasers. note that even if you won the challenge the lasers will still turn on and off on a timer. You also win a bag containing a lot of bombs and ropes. The arrow of light is necessary to get to the Cosmic Ocean. |
||
| ⚫ | |||
| − | Sunken City is a grotesque, Lovecraft-inspired (hence the name) location with what appears to be upside-down human eyes, mouths, brains and the like scattered on the walls and in the terrain. The stages here tend to be compact, connected with fleshy tubes and laden with traps more so than enemies. The water here also flows upwards. |
||
| − | <br /> |
||
| ⚫ | |||
| − | This level always has a shrine to place the [[Eggplant Child]] and an entrance to [[Eggplant World]]. It is located by finding a statue of a woman with her arms looking like she is holding something in her lap, with a red door with a crest of [[King Yama]]'s head on it. Place the [[Eggplant Child|Eggplant child]] in the woman statue's arms and the door will open. It is also possible to get 4 hearts by waiting a few seconds when placing down the [[Eggplant Child|Eggplant child]] in the statue's arms, this is also possible by just laying in her arms yourself. |
||
| + | As an entirely separate location from the game not taking place on the moon, the Sunken City has seemingly built its own cohesive and strange ecosystem built between [[Frog|Frogs]], [[Giant Fly|Giant Flies]], and their offspring. |
||
| + | [[Giant Fly|Giant Flies]] (presumably) lay large [[Egg Sac|egg sacs]] containing considerable amounts of [[Grub]], which are eaten by [[Frog|Frogs]] and [[Fire Frog|Fire Frogs]], who are conversely eaten by [[Giant Fly|Giant Flies]], which are easily devoured whole by [[Goliath Frog|Goliath Frogs]]. |
||
| − | '''Dirk Tamaoka (character)''' |
||
| + | As Goliath Frogs are the "apex predator" of the Sunken City, [[Frog Trap|Frog Traps]] were presumably constructed to cull their numbers.[[File:Spelunky 2 OST - Sunken City Dark - 1000 eyes.mp3|thumb|Sunken City dark music]] |
||
| + | ===7-1: [[Eggplant World]] Door, [[Waddler]]=== |
||
| + | ===Mother Statue=== |
||
| − | In 7-1 you can find a new character in a coffin. That is [[Spelunky 2 Characters|Dirk Tamaoka]]. He is a ninja with grey clothing and a face mask. |
||
| + | 7-1 always has the Mother Statue, next to the door to [[Eggplant World]]. Placing the [[Eggplant Child]] in the Mother Statue's arms will open the door to [[Eggplant World]]. It is possible to get 4 hearts by being in her arms for 10 seconds.[[File:Eggplantentrance.png|thumb|A player witnessing the opening of the door to [[Eggplant World]] in 7-1.|alt=|none]] |
||
| − | [[File:Dirk Yamaoka.png|thumb|271x271px|<sub>Dirk Yamaoka from the journal. People entry 18: A master Ninja always looking to hone his skills. When the moon called, he answered without hesitation.</sub>]] |
||
| − | <br /> |
||
| − | === 7-4 === |
||
| − | This level is always [[Hundun's Hideout]]. |
||
| + | ===[[Waddler|Waddler's]] Cave=== |
||
| − | <br /> |
||
| + | The final stop where the player can find [[Waddler]] is also found in 7-1. This time, it is simply out in the open along the main path instead of being a hidden door behind a wall. |
||
| + | [[File:Waddlersunken.png|none|thumb|The entrance to [[Waddler|Waddler's]] cave in 7-1.]] |
||
| + | ===7-1, 7-2, 7-3: [[Tun|Sun Challenge]], [[Goliath Frog|Goliath Frogs]]=== |
||
| ⚫ | |||
| − | [[Traps|Frog trap]], [[Traps|Sticky Trap]], [[Traps|Bone drop]], [[Traps|Egg sac]] |
||
| + | ====[[Tun|Sun Challenge]]==== |
||
| − | ==Monsters== |
||
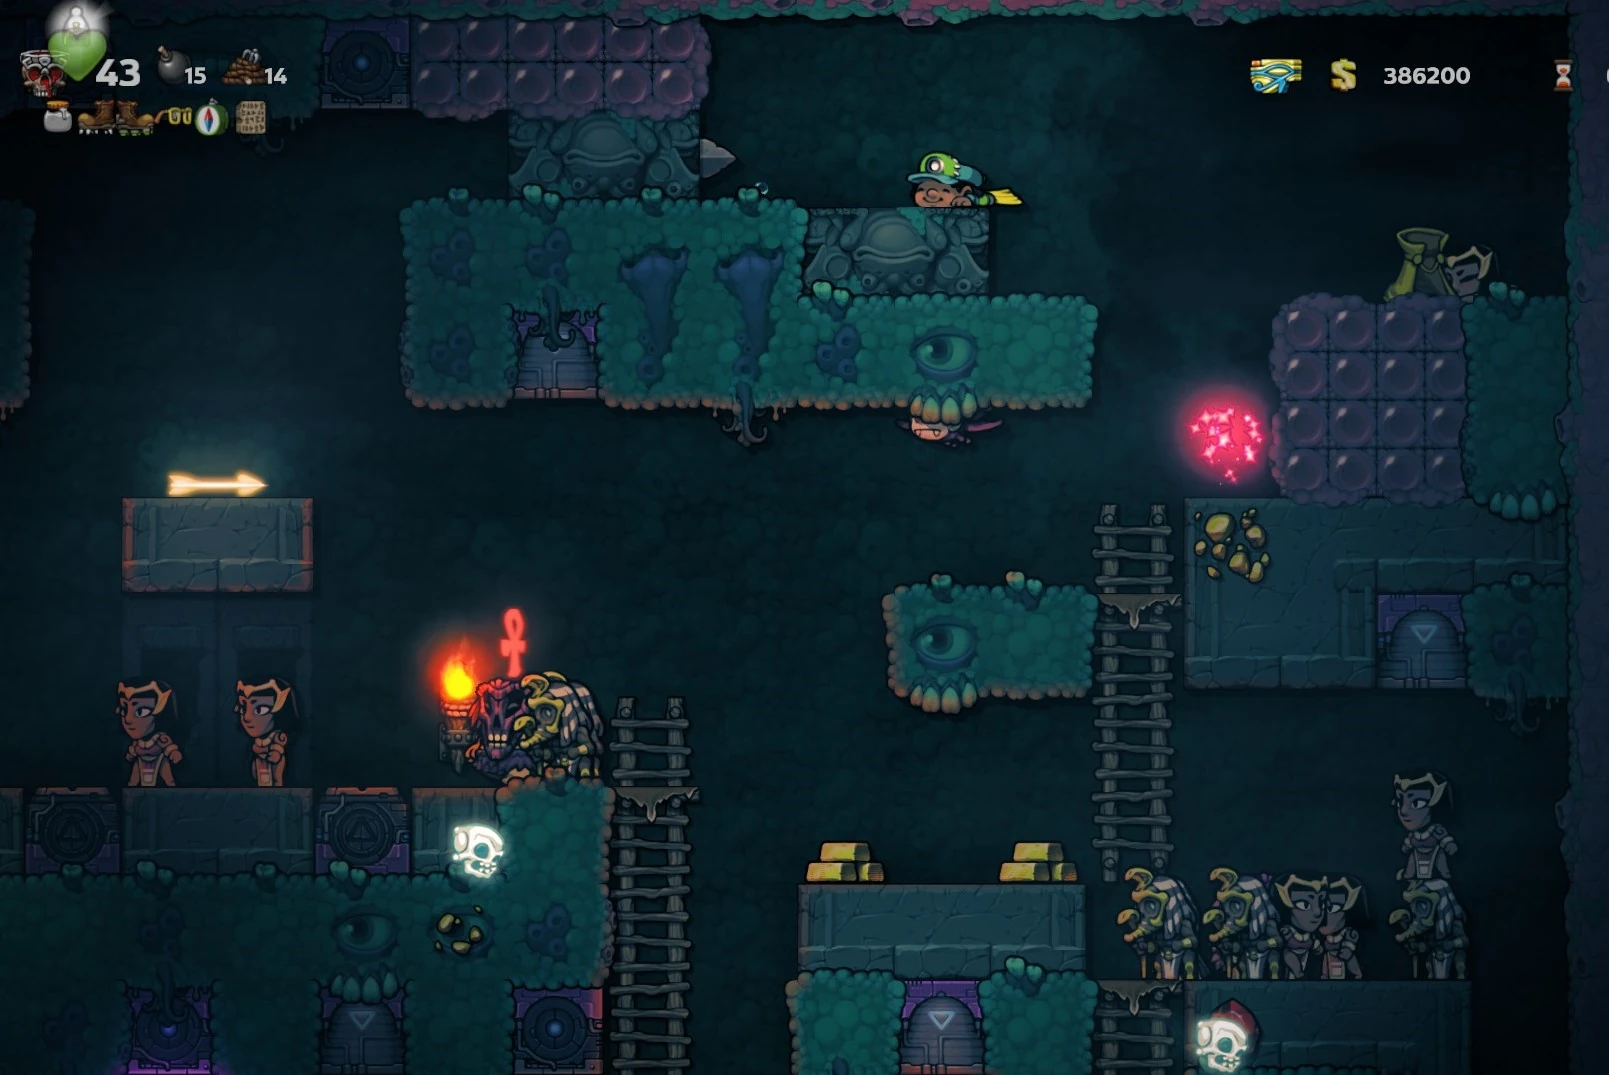
| + | [[File:SunChallenge.jpg|none|thumb|239x239px|A player surviving the Sun Challenge by hiding in the upper portion of the challenge and having destroyed the nearby spawner. ]] |
||
| ⚫ | |||
| + | The [[Tun|Sun Challenge]] is the final challenge hosted by [[Tun]]. It will spawn in either 7-1, 7-2 or 7-3, with 7-1 being it's most common spawn point. |
||
| ⚫ | |||
| + | |||
| ⚫ | |||
| + | Upon entering the building with the Sun Challenge, [[Tun]] will say, ''"A warning, Reborn... the Sun Challenge may cost you your life."'' This warning is not to be underestimated or taken lightly by the player, as the Sun Challenge asks of the player to survive a massive swarm of [[Sorceress|Sorceresses]], [[Vampire|Vampires]], [[Necromancer|Necromancers]], and even [[Witch Doctor|Witch Doctors]] as they flood into the area via enemy spawners. |
||
| ⚫ | |||
| + | |||
| ⚫ | |||
| + | If the player survives long enough, every enemy will die instantly, and they will be allowed to take the [[Arrow Of Light|Arrow of Light]] on top of a [[Corpse Bag|corpse bag]] containing 24 bombs and 24 rope sitting by the exit. |
||
| ⚫ | |||
| + | |||
| − | [[Hundun]] |
||
| + | ====='''Tips and Tricks'''===== |
||
| + | |||
| + | *A common strategy to survive the Sun Challenge is to run up to one of the upper corners of the area, use a bomb to destroy the spawner up in the corner, and standing in a place where the nearby [[Traps|Frog Traps]], [[Regenerating Block|Regenerating Blocks]], or enemies cannot harm them until the challenge is complete. |
||
| + | *If the Sun Challenge spawns in 7-1, the player can use [[Waddler]] to bring [[Excalibur]] with them (along with [[Hou Yi's Bow]] if they plan to reach the [[Cosmic Ocean]]) into the challenge. As the blade will instantly gib enemies, [[Necromancer|Necromancers]] will not be able to resurrect them in response to their death. However, if the Sun Challenge does not spawn on 7-1, they cannot use it in the challenge without leaving [[Hou Yi's Bow]] behind with [[Waddler]] or using a second pair of hands to carry both it and [[Excalibur]] to the level containing the challenge. |
||
| + | *If the challenge spawns on 7-1, the player should hurry through the level to complete other tasks, such as navigating through the level, disarming [[Arrow Trap|Arrow Traps]], finding [[Spelunky 2 Characters|Waddler]] or opening the door to [[Eggplant World]], as it will not give the player a [[Four-leaf Clover|Four Leaf Clover]] and thus leave them with little time to complete these tasks safely before [[The Ghost]] arrives. |
||
| + | *The [[Clone Gun]] may be brought to the Sunken City, possibly with the help of [[Waddler]] or [[Hired Hand|Hired Hands]], and can be used to clone the [[Corpse Bag]] that drops after completing the Sun Challenge to gain a maximum of 99 bombs and 99 rope. |
||
| + | |||
| + | ====[[Goliath Frog|Goliath Frogs]]==== |
||
| + | [[File:BellyOfTheBeast.gif|none|thumb|Exploring the innards of a deceased [[Goliath Frog]].]] |
||
| + | In 7-1 through 7-3, the playable character [[Spelunky 2 Characters|Dirk Yamaoka]] can be found within the guts of a [[Goliath Frog]], who only spawn on these levels. Attempting to enter a [[Goliath Frog]] while it is still alive will cause it to eat the player, killing them instantly. Instead, a player must kill the frog first, where only then will they be able to enter the insides of the beast and free [[Spelunky 2 Characters|Dirk Yamaoka]] from his coffin. [[Tadpole|Tadpoles]] will occasionally be found floundering about within [[Goliath Frog]] bellies as well. |
||
| ⚫ | |||
| + | This level is always [[Hundun's Hideaway]]. Here, the player will ascend up the standard world generation of the previous three levels, with a major adjustment; [[Hundun]] will be pressuring the player upward into the main arena along with a [[Spike Shoes|spike]] pit, where the final major battle between the player and [[Hundun]] can begin. |
||
| + | |||
| + | Defeating [[Hundun]] will open a door at the top of the level that will allow a player to get the [[Endings/2|Hard Ending]], while shooting the opened eye of a defeated [[Hundun]] with [[Hou Yi's Bow]] armed with the [[Arrow Of Light]] will open a portal to the [[Cosmic Ocean]]. |
||
| + | [[File:Entering-Cosmic-Ocean.gif|none|thumb|288x288px|Entering the [[Cosmic Ocean]] by shooting the eye of a defeated [[Hundun]] using the [[Hou Yi's Bow|correct weapon]] and [[Arrow Of Light|ammunition]]. ]] |
||
| + | |||
| + | ==Enemies== |
||
| + | {| style="text-align:center; width: 67%" border="0" cellpadding="0" cellspacing="0" |
||
| + | |{{tile |
||
| + | |title = [[Shopkeeper]] |
||
| + | |body = [[File:Shopkeeper2.png|150px|link=Shopkeeper]] |
||
| + | }} |
||
| + | |{{tile |
||
| ⚫ | |||
| + | |body = [[File:Skeleton S2.png|150px|link=Skeleton]] |
||
| + | }} |
||
| + | |{{tile |
||
| + | |title = [[Tadpole]] |
||
| + | |body = [[File:Tadpole.png|150px|link=tadpole]] |
||
| + | }} |
||
| + | |- |
||
| + | |{{tile |
||
| ⚫ | |||
| + | |body = [[File:Frog S2.png|150px|link=Frog]] |
||
| + | }} |
||
| + | |{{tile |
||
| ⚫ | |||
| + | |body = [[File:Fire Frog S2.png|150px|link=Fire Frog]] |
||
| + | }} |
||
| + | |{{tile |
||
| ⚫ | |||
| + | |body = [[File:Goliath Frog.png|150px|link=Goliath Frog]] |
||
| + | }} |
||
| + | |- |
||
| + | |{{tile |
||
| ⚫ | |||
| + | |body = [[File:Grub.png|150px|link=Grub]] |
||
| + | }} |
||
| + | |{{tile |
||
| ⚫ | |||
| + | |body = [[File:Giantfly.png|150px|link=Giant Fly]] |
||
| + | }} |
||
| + | |} |
||
| ⚫ | |||
| + | {| style="text-align:center; width: 67%" border="0" cellpadding="0" cellspacing="0" |
||
| + | |{{tile |
||
| + | |title = [[Arrow Trap]] |
||
| + | |body = [[File:Sunken City Arrow Trap Variant.png|150px|link=Arrow Trap]] |
||
| + | }} |
||
| + | |{{tile |
||
| + | |title = [[Frog Trap]] |
||
| + | |body = [[File:Frog Trap S2.png|150px|link=Frog Trap]] |
||
| + | }} |
||
| + | |{{tile |
||
| + | |title = [[Sticky Trap]] |
||
| + | |body = [[File:Sticky Trap S2.png|150px|link=Sticky Trap]] |
||
| + | }} |
||
| + | |- |
||
| + | |{{tile |
||
| + | |title = [[Bone Drop]] |
||
| + | |body = [[File:Bone Drop S2.png|150px|link=Bone Drop]] |
||
| + | }} |
||
| + | |{{tile |
||
| + | |title = [[Egg Sac]] |
||
| + | |body = [[File:EggSac.png|150px|link=Egg Sac]] |
||
| + | }} |
||
| + | |{{tile |
||
| + | |title = [[Regenerating Block|Regen Block]] |
||
| + | |body = [[File:RegeneratingBlock.png|150px|link=Regenerating Block]] |
||
| + | }} |
||
| + | |} |
||
| + | ==Reaching the Sunken City == |
||
| + | [[File:Spelunky 2 map.png|thumb|An easy reference guide showing how to reach the Sunken City and beyond.]] |
||
| + | The easiest, most sensible way to reach the Sunken City is by using the [[Qilin]] to fly up the Laser Trap section above Tiamat's Throne. To obtain the [[Qilin]], one must obtain the correct [[Ushabti]], which is located with the [[Tablet of Destiny]], which is obtained after jumping through various hoops throughout the game. |
||
| + | |||
| + | Below is a step by step guide on how to make it to the Sunken City. This is when a player rigorously follows the questline. |
||
| + | |||
| + | Some of these steps can be [[Skips/2|skipped]], such as skipping the [[Udjat Eye]] and finding the [[The Black Market|Black Market]] without it's help to get the [[Hedjet]], or even retaining the Ankh while still going to [[Abzu]]. These are elaborated in the [[Skips/2|Skips]] wiki page. |
||
| + | |||
| + | For more information on specific steps, please refer to the articles written about the items/areas in question. |
||
| + | |||
| + | ===<u>'''Step 1: Earn the [[Udjat Eye]]'''</u>=== |
||
| + | The [[Udjat Eye]] is found in either level 1-2 or 1-3 of the [[Dwelling]]. One must take the [[Key]] to the [[Big Chest]], which stores the [[Udjat Eye]] inside. |
||
| + | |||
| + | ===<u>'''Step 2: Collect the [[Crown]]/Hold the [[Hedjet]]'''</u>=== |
||
| + | The player now must get their hands on either the [[Crown]] or [[Hedjet]]. In terms of reaching the Sunken City, they are <u>functionally identical</u>. |
||
| + | |||
| + | ==== Option 1; Collecting the [[Crown]]:==== |
||
| + | The Crown is found in [[Vlad's Castle]], residing in [[Volcana]]. Placing the Udjat Eye in a socket in a Neo Babylonian structure at the top of one of the levels will cause a drill to bore it's way to the castle entrance. The Crown rests on a statue at the top of the castle, where [[Vlad]] resides. |
||
| + | |||
| + | ====Option 2; Finding the [[Hedjet]]:==== |
||
| + | The [[Hedjet]] is picked up in the [[The Black Market|Black Market]], hidden behind the walls of [[The Jungle]]. When a player gets near the hidden entrance, the [[Udjat Eye]] on the HUD will begin opening and flashing blue. The closer a player is to the entrance, the more often the eye will flash. Once a player has deduced the location of the [[The Black Market|Black Market]], they may bomb the entrance open. Within, they can purchase the [[Hedjet]] from a specific [[shopkeeper]] for $40,000, or even steal it if the player is willing to take the risk of almost certain death to the [[Shopkeeper|shopkeepers]]. |
||
| + | |||
| + | ====Tips and Tricks:==== |
||
| + | |||
| + | * Neither [[Vlad's Castle]] or the [[The Black Market|Black Market]] can spawn on either 2-1 or in the same level as the [[Tun#Moon Challenge|Moon Challenge]]. |
||
| + | *It is highly recommended to take advantage of the resources in either hidden area, such as [[Vlad's Cape]], or anything that might be sold by [[Shopkeeper|Shopkeepers]], such as [[Jetpack|Jetpacks]] or [[Bombs|Bomb Boxes]]. |
||
| + | |||
| + | ===<u>'''Step 3: Acquire the [[Ankh]]'''</u>=== |
||
| + | The [[Ankh]] is obtained in the sub area of [[Olmec's Lair]]. In order to access the sub area, one must defeat [[Olmec]] by making him drop into the lava lake at the bottom of the level. As he sinks into the lava, the player will be able to enter the door to the sub area by standing on his head and waiting until it aligns with the doorway. From there, if they ascend to the top of the sub area, the [[Ankh]] will be waiting for them. |
||
| + | |||
| + | ==='''<u>Step 4: Use the [[Ankh]] to reach [[Abzu]]/[[Duat]]</u>'''=== |
||
| + | From [[Olmec's Lair]], the player has a choice of entering either [[Tide Pool]] or [[Temple of Anubis]]. Within either of these worlds, they can use the [[Ankh]] to enter either [[Abzu]] or the [[Duat]]. |
||
| + | [[File:Abzu lava trap.gif|thumb|Activating the lava trap in [[Tide Pool]] 4-3, using the Ankh to return to the top, and retrieving [[Excalibur]] to enter Abzu with, now that the doorway is available.]] |
||
| + | |||
| + | ====Option 1; Accessing [[Abzu]]:==== |
||
| + | Before moving to [[Abzu]] in 4-3, the player should pull [[Excalibur]] from it's stone from 4-2 using the power of the [[Crown]]/[[Hedjet]], as the sword will prove invaluable once the player enters [[Abzu]]. |
||
| + | |||
| + | Abzu is entered through a hidden door inside of a massive lava lake in Tide Pool 4-3. <u>The player should first leave [[Excalibur]] at the entrance of the level. This is a very important step.</u> |
||
| + | |||
| + | After, they should locate a door to a sub area. Within the sub area, the player will be able to travel to the bottom of the level where they will find a one way door. |
||
| + | |||
| + | Once passing through, the player can find and trigger an [[Golden Idol|idol]] trap that will cause the [[lava]] to fall. Once the [[lava]] kills the player, the [[Ankh]] will resurrect them and teleport them back to the level entrance, where they left [[Excalibur]]. With the [[lava]] lake out of the way, and [[Excalibur]] in hand, the player can make their way down to the bottom of the level near the normal level exit and search for the entrance to Abzu down below. |
||
| + | |||
| + | As aforementioned, it is possible to retain the [[Ankh]] and still visit [[Abzu]]. [[Ankh]] [[Skips/2|Skips]] are written in detail in the [[Skips/2|Skips]] wiki page. |
||
| + | ====Option 2; Delving into the [[Duat]]:==== |
||
| + | [[File:Spelunky2-wiki-entering-duat.gif|thumb|Entering the [[Duat]] with the help of the [[Ankh]].]]The [[Duat]] is accessed by sacrificing oneself on the [[Altar]] in [[The City of Gold]] with the [[Ankh]] in their possession. To reach [[The City of Gold]], the player will have to defeat [[Anubis]] in 4-1 and seize his [[Scepter]]. Afterward, they can find a golden door in 4-2. With the [[scepter]], and either the [[Hedjet]]/[[Crown]] in their inventory, the door to [[The City of Gold]] will open. |
||
| + | |||
| + | The player, still with the [[Ankh]] and now in [[The City of Gold]], can now sacrifice themselves on the [[Altar]] to enter the [[Duat]]. |
||
| + | |||
| + | ===<u>'''Step 5: Defeat [[Kingu]]/[[Osiris]] for the [[Tablet of Destiny]]'''</u>=== |
||
| + | |||
| + | ====Option 1; Defeating [[Kingu]]==== |
||
| + | Atop the depths of [[Abzu]], the player can face [[Kingu]]. With [[Excalibur]] in hand, the player can use the sub area to ascend up [[Abzu]] to get on [[Kingu|Kingu's]] shell. They can then repeatedly swing [[Excalibur]] until [[Kingu]] is dead, leaving behind the [[Tablet of Destiny]]. The player can now take the door to the [[Ice Caves]]. |
||
| + | |||
| + | ====Option 2; Overcoming [[Osiris]]==== |
||
| + | At the top of the [[Duat]], a Spelunker will find the judger of souls, [[Osiris]]. A few seconds after his appearance, [[Anubis II]] will spawn to provide backup. If the player can manage to kill [[Osiris]], he will explode into [[Treasure|emeralds]], drop the [[Tablet of Destiny]], and leave behind a portal to the [[The Ice Caves|Ice Caves]]. |
||
| + | |||
| + | ==='''<u>Step 6: Using the [[Tablet of Destiny]] to find the correct [[Ushabti]]</u>'''=== |
||
| + | Within [[Neo Babylon]] 6-2, an entrance to a sub area will be available. Within it will be every single possible variation of [[Ushabti]]. By reading the journal entry of the [[Tablet of Destiny]], the player can deduce which one of the many to take with them to the next level. |
||
| + | |||
| + | If the player took the correct [[Ushabti]] to the next level (6-3), they may put it down on the ground, allowing it to hatch into the [[Qilin]]. |
||
| + | |||
| + | ==='''<u>Step 7: Riding the [[Qilin]] above [[Tiamat's Throne]]</u>'''=== |
||
| + | [[File:Qilin usage in Tiamat's throne.gif|thumb|227x227px|The correct technique used to ascend above [[Tiamat's Throne]] to reach the ship that will take the player to the Sunken City.]] |
||
| + | If one successfully makes it to [[Tiamat's Throne]] with the [[Qilin]] still alive and well, they may use it's infinite flight to ascend past the [[Forcefield|Forcefields]] and [[Spark Trap|Spark Traps]] at the top of the arena. They do not have to defeat [[Queen Tiamat|Tiamat]] in order to progress here. |
||
| + | |||
| + | If the [[Spelunkers|Spelunker]] succeeds in their ascent, they will find [[Tun]] beside a door congratulating them for their progress. There will be a one tile door next to her that the player must progress through, meaning that they must leave the [[Qilin]] behind. Behind the door will be an [[Olmec]]-shaped spaceship which will at last take them to the Sunken City. |
||
| + | |||
| + | Although the [[Qilin]] is the easiest, safest way to ascend up to the Sunken City, it is not the only way. Every other way to ascend is known as a [[Qilin]] [[Skips/2|Skip]], and is written about in detail on the [[Skips/2|Skips]] wiki page. |
||
[[Category:Places]] |
[[Category:Places]] |
||
[[Category:Spelunky 2]] |
[[Category:Spelunky 2]] |
||
| + | [[Category:Needs Images]] |
||
Revision as of 15:54, 1 March 2021
The Sunken City is the secret seventh world in Spelunky 2. It is accessed by riding the Qilin up Tiamat's throne and reaching the Olmec spaceship.
Geography
Sunken City Music
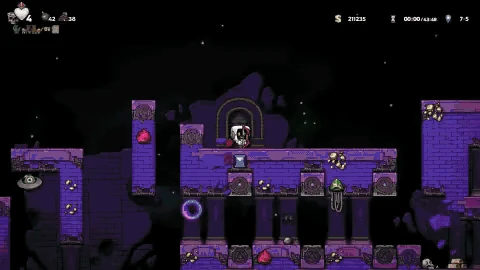
The Sunken City is loosely based off of the Lovecraftian city of R'yleh, and reflects that in its appearance. It is a "reverse" world, where the player starts at the bottom of each level, and makes it to the level exit found at the top. The gravity of water is also flipped here, as it will fall upwards.
Many of the enemies here are seemingly much less dangerous than what the player previously encountered, as most of them simply approach the player and deal only 1 HP. The real hazard that Sunken City enemies pose is the large amount of time that the player is faltered after being hit by them, which could lead them to their doom into Spikes or Regenerating Blocks.
As an entirely separate location from the game not taking place on the moon, the Sunken City has seemingly built its own cohesive and strange ecosystem built between Frogs, Giant Flies, and their offspring.
Giant Flies (presumably) lay large egg sacs containing considerable amounts of Grub, which are eaten by Frogs and Fire Frogs, who are conversely eaten by Giant Flies, which are easily devoured whole by Goliath Frogs.
As Goliath Frogs are the "apex predator" of the Sunken City, Frog Traps were presumably constructed to cull their numbers.
Sunken City dark music
7-1: Eggplant World Door, Waddler
Mother Statue
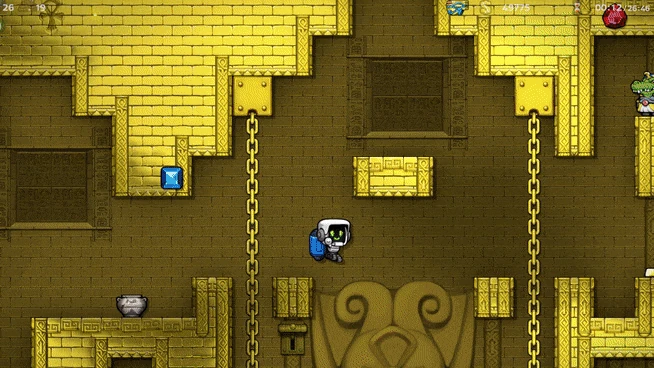
7-1 always has the Mother Statue, next to the door to Eggplant World. Placing the Eggplant Child in the Mother Statue's arms will open the door to Eggplant World. It is possible to get 4 hearts by being in her arms for 10 seconds.
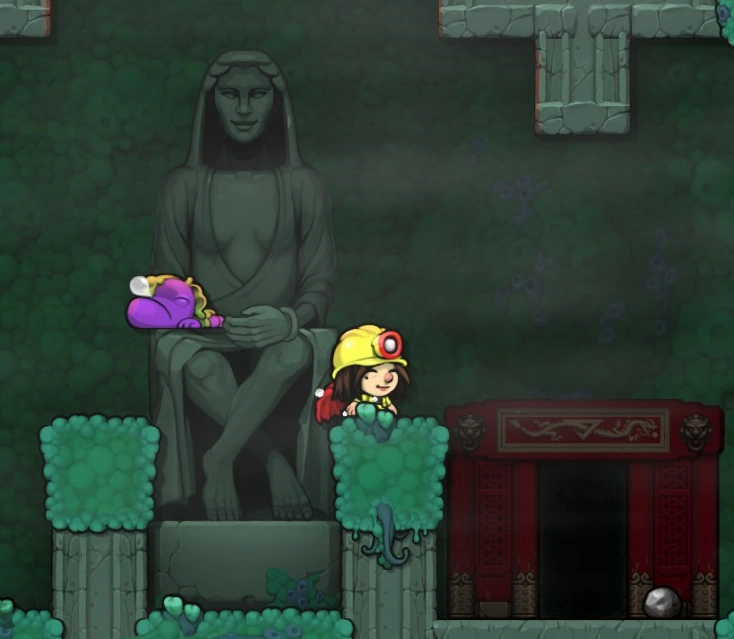
A player witnessing the opening of the door to Eggplant World in 7-1.
Waddler's Cave
The final stop where the player can find Waddler is also found in 7-1. This time, it is simply out in the open along the main path instead of being a hidden door behind a wall.
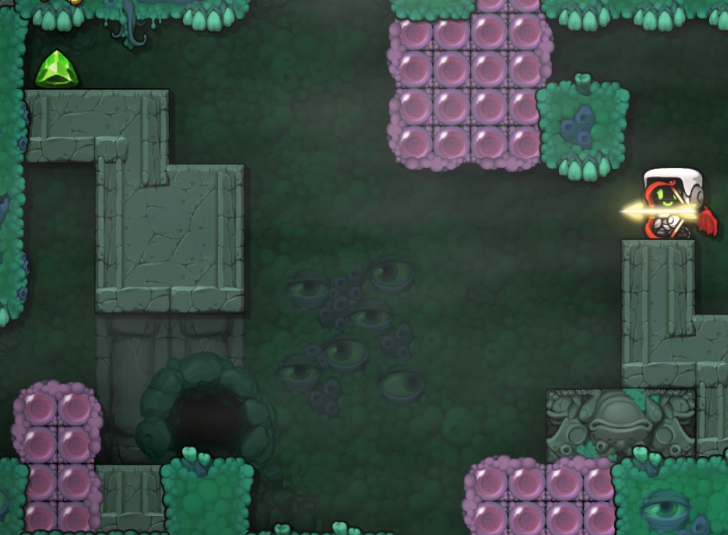
The entrance to Waddler's cave in 7-1.
7-1, 7-2, 7-3: Sun Challenge, Goliath Frogs
Sun Challenge
A player surviving the Sun Challenge by hiding in the upper portion of the challenge and having destroyed the nearby spawner.
The Sun Challenge is the final challenge hosted by Tun. It will spawn in either 7-1, 7-2 or 7-3, with 7-1 being it's most common spawn point.
Upon entering the building with the Sun Challenge, Tun will say, "A warning, Reborn... the Sun Challenge may cost you your life." This warning is not to be underestimated or taken lightly by the player, as the Sun Challenge asks of the player to survive a massive swarm of Sorceresses, Vampires, Necromancers, and even Witch Doctors as they flood into the area via enemy spawners.
If the player survives long enough, every enemy will die instantly, and they will be allowed to take the Arrow of Light on top of a corpse bag containing 24 bombs and 24 rope sitting by the exit.
Tips and Tricks
- A common strategy to survive the Sun Challenge is to run up to one of the upper corners of the area, use a bomb to destroy the spawner up in the corner, and standing in a place where the nearby Frog Traps, Regenerating Blocks, or enemies cannot harm them until the challenge is complete.
- If the Sun Challenge spawns in 7-1, the player can use Waddler to bring Excalibur with them (along with Hou Yi's Bow if they plan to reach the Cosmic Ocean) into the challenge. As the blade will instantly gib enemies, Necromancers will not be able to resurrect them in response to their death. However, if the Sun Challenge does not spawn on 7-1, they cannot use it in the challenge without leaving Hou Yi's Bow behind with Waddler or using a second pair of hands to carry both it and Excalibur to the level containing the challenge.
- If the challenge spawns on 7-1, the player should hurry through the level to complete other tasks, such as navigating through the level, disarming Arrow Traps, finding Waddler or opening the door to Eggplant World, as it will not give the player a Four Leaf Clover and thus leave them with little time to complete these tasks safely before The Ghost arrives.
- The Clone Gun may be brought to the Sunken City, possibly with the help of Waddler or Hired Hands, and can be used to clone the Corpse Bag that drops after completing the Sun Challenge to gain a maximum of 99 bombs and 99 rope.
Goliath Frogs
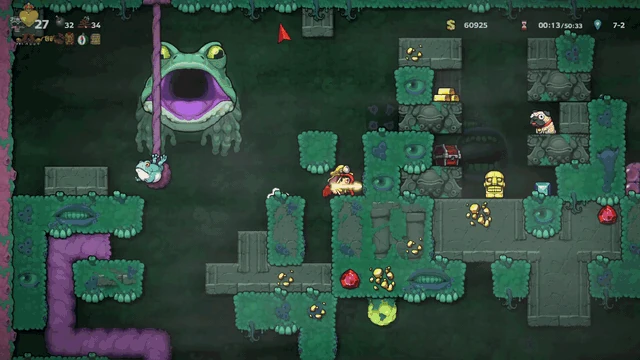

Exploring the innards of a deceased Goliath Frog.
In 7-1 through 7-3, the playable character Dirk Yamaoka can be found within the guts of a Goliath Frog, who only spawn on these levels. Attempting to enter a Goliath Frog while it is still alive will cause it to eat the player, killing them instantly. Instead, a player must kill the frog first, where only then will they be able to enter the insides of the beast and free Dirk Yamaoka from his coffin. Tadpoles will occasionally be found floundering about within Goliath Frog bellies as well.
7-4
This level is always Hundun's Hideaway. Here, the player will ascend up the standard world generation of the previous three levels, with a major adjustment; Hundun will be pressuring the player upward into the main arena along with a spike pit, where the final major battle between the player and Hundun can begin.
Defeating Hundun will open a door at the top of the level that will allow a player to get the Hard Ending, while shooting the opened eye of a defeated Hundun with Hou Yi's Bow armed with the Arrow Of Light will open a portal to the Cosmic Ocean.

Entering the Cosmic Ocean by shooting the eye of a defeated Hundun using the correct weapon and ammunition.
Enemies


Traps


Reaching the Sunken City


An easy reference guide showing how to reach the Sunken City and beyond.
The easiest, most sensible way to reach the Sunken City is by using the Qilin to fly up the Laser Trap section above Tiamat's Throne. To obtain the Qilin, one must obtain the correct Ushabti, which is located with the Tablet of Destiny, which is obtained after jumping through various hoops throughout the game.
Below is a step by step guide on how to make it to the Sunken City. This is when a player rigorously follows the questline.
Some of these steps can be skipped, such as skipping the Udjat Eye and finding the Black Market without it's help to get the Hedjet, or even retaining the Ankh while still going to Abzu. These are elaborated in the Skips wiki page.
For more information on specific steps, please refer to the articles written about the items/areas in question.
Step 1: Earn the Udjat Eye
The Udjat Eye is found in either level 1-2 or 1-3 of the Dwelling. One must take the Key to the Big Chest, which stores the Udjat Eye inside.
Step 2: Collect the Crown/Hold the Hedjet
The player now must get their hands on either the Crown or Hedjet. In terms of reaching the Sunken City, they are functionally identical.
Option 1; Collecting the Crown:
The Crown is found in Vlad's Castle, residing in Volcana. Placing the Udjat Eye in a socket in a Neo Babylonian structure at the top of one of the levels will cause a drill to bore it's way to the castle entrance. The Crown rests on a statue at the top of the castle, where Vlad resides.
Option 2; Finding the Hedjet:
The Hedjet is picked up in the Black Market, hidden behind the walls of The Jungle. When a player gets near the hidden entrance, the Udjat Eye on the HUD will begin opening and flashing blue. The closer a player is to the entrance, the more often the eye will flash. Once a player has deduced the location of the Black Market, they may bomb the entrance open. Within, they can purchase the Hedjet from a specific shopkeeper for $40,000, or even steal it if the player is willing to take the risk of almost certain death to the shopkeepers.
Tips and Tricks:
- Neither Vlad's Castle or the Black Market can spawn on either 2-1 or in the same level as the Moon Challenge.
- It is highly recommended to take advantage of the resources in either hidden area, such as Vlad's Cape, or anything that might be sold by Shopkeepers, such as Jetpacks or Bomb Boxes.
Step 3: Acquire the Ankh
The Ankh is obtained in the sub area of Olmec's Lair. In order to access the sub area, one must defeat Olmec by making him drop into the lava lake at the bottom of the level. As he sinks into the lava, the player will be able to enter the door to the sub area by standing on his head and waiting until it aligns with the doorway. From there, if they ascend to the top of the sub area, the Ankh will be waiting for them.
Step 4: Use the Ankh to reach Abzu/Duat
From Olmec's Lair, the player has a choice of entering either Tide Pool or Temple of Anubis. Within either of these worlds, they can use the Ankh to enter either Abzu or the Duat.

Activating the lava trap in Tide Pool 4-3, using the Ankh to return to the top, and retrieving Excalibur to enter Abzu with, now that the doorway is available.
Option 1; Accessing Abzu:
Before moving to Abzu in 4-3, the player should pull Excalibur from it's stone from 4-2 using the power of the Crown/Hedjet, as the sword will prove invaluable once the player enters Abzu.
Abzu is entered through a hidden door inside of a massive lava lake in Tide Pool 4-3. The player should first leave Excalibur at the entrance of the level. This is a very important step.
After, they should locate a door to a sub area. Within the sub area, the player will be able to travel to the bottom of the level where they will find a one way door.
Once passing through, the player can find and trigger an idol trap that will cause the lava to fall. Once the lava kills the player, the Ankh will resurrect them and teleport them back to the level entrance, where they left Excalibur. With the lava lake out of the way, and Excalibur in hand, the player can make their way down to the bottom of the level near the normal level exit and search for the entrance to Abzu down below.
As aforementioned, it is possible to retain the Ankh and still visit Abzu. Ankh Skips are written in detail in the Skips wiki page.
Option 2; Delving into the Duat:
The Duat is accessed by sacrificing oneself on the Altar in The City of Gold with the Ankh in their possession. To reach The City of Gold, the player will have to defeat Anubis in 4-1 and seize his Scepter. Afterward, they can find a golden door in 4-2. With the scepter, and either the Hedjet/Crown in their inventory, the door to The City of Gold will open.
The player, still with the Ankh and now in The City of Gold, can now sacrifice themselves on the Altar to enter the Duat.
Step 5: Defeat Kingu/Osiris for the Tablet of Destiny
Option 1; Defeating Kingu
Atop the depths of Abzu, the player can face Kingu. With Excalibur in hand, the player can use the sub area to ascend up Abzu to get on Kingu's shell. They can then repeatedly swing Excalibur until Kingu is dead, leaving behind the Tablet of Destiny. The player can now take the door to the Ice Caves.
Option 2; Overcoming Osiris
At the top of the Duat, a Spelunker will find the judger of souls, Osiris. A few seconds after his appearance, Anubis II will spawn to provide backup. If the player can manage to kill Osiris, he will explode into emeralds, drop the Tablet of Destiny, and leave behind a portal to the Ice Caves.
Step 6: Using the Tablet of Destiny to find the correct Ushabti
Within Neo Babylon 6-2, an entrance to a sub area will be available. Within it will be every single possible variation of Ushabti. By reading the journal entry of the Tablet of Destiny, the player can deduce which one of the many to take with them to the next level.
If the player took the correct Ushabti to the next level (6-3), they may put it down on the ground, allowing it to hatch into the Qilin.
Step 7: Riding the Qilin above Tiamat's Throne

The correct technique used to ascend above Tiamat's Throne to reach the ship that will take the player to the Sunken City.
If one successfully makes it to Tiamat's Throne with the Qilin still alive and well, they may use it's infinite flight to ascend past the Forcefields and Spark Traps at the top of the arena. They do not have to defeat Tiamat in order to progress here.
If the Spelunker succeeds in their ascent, they will find Tun beside a door congratulating them for their progress. There will be a one tile door next to her that the player must progress through, meaning that they must leave the Qilin behind. Behind the door will be an Olmec-shaped spaceship which will at last take them to the Sunken City.
Although the Qilin is the easiest, safest way to ascend up to the Sunken City, it is not the only way. Every other way to ascend is known as a Qilin Skip, and is written about in detail on the Skips wiki page.