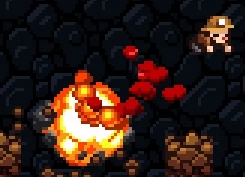
Don't let this happen to you!
General Tips
- Don't drop off a ledge if you can't see where you're going to land. Press down to scroll the screen and see what's below you - if the ground isn't visible, you're going to take damage from the fall, and that's the best case scenario. (Worst case scenarios include man-eating plants, lava, spikes, et cetera.) Use your flip-hang maneuver (crawl off a ledge) or employ ropes and other tools to avoid falling into unseen dangers.
- You do not take damage from a fall when landing on an enemy (unless it's a man-eating plant or a spring), a spiderweb, or water
- By using the flip-hang maneuver you lose any held item, to remedy this walk off the edge and quickly turn back on yourself to catch the edge.
- If your path to the level exit is blocked by the ghost, try luring it upwards by climbing a rope, then dropping down and running under it.
- You can shift-sprint over single block gaps in the floor, allowing you to effectively ignore them (Handy when being chased by spike blocks)
Tips for Items and Weapons
(More information about specific items and weapons can be found in their articles.)
- Many obstacles, like tall, thin walls, can be overcome with either a bomb or a rope. If possible, use whichever item you have more of to bypass the obstacle - the last thing you want is to use your last bomb, then be stuck in a situation that can only be resolved with bombs.
- Be exceptionally careful with the bow. Prior to v.99.9, it was rarely worthwhile due to its poor range, the unavailability of fresh ammo in Areas 2 and 3, and the danger of ricocheting arrows; its new function has transformed it into an awesomely effective rocket launcher, but the previous caveats still apply.
- Don't overlook the rope's use as an offensive weapon. It's the only item in the game that can be thrown straight up, which can be helpful if, say, a bat is descending on you from directly above.
- If possible, always carry a rock (or better, a pick's broken head). Or in case the lack of it, an arrow, vase or skull. You'll never know when you'll have to face enemies, and if you are not carrying any weapons, these still offer better than the whip. They are also greatly useful for disarming the arrow traps. Just be careful about using them. Certain items when bounced back cause you damage; take advantage of those that do not when you can.
- Often times when you don't have enough money to buy an item, you should consider stealing it from the shop. You will only incur the wrath of the shopkeepers for one additional level (the current level and the next level) provided the shopkeeper from the shop you stole from did not die chasing you. Ideally, pick up the item you want to steal and run away as quickly as possible. The item you picked up will be usable once you leave the shop; therefore, stealing a jetpack can often be worth the risk. The shopkeepers have the reflexes of an old west gunslinger and will fire as you leave, meaning that you want to jump as soon as you're out of the shop. If there's no nearby vertical terrain, consider dropping a rope or staying honest.
- You can pick up and use weapons that are for sale in shops without first paying for them. This can be very useful if you want to rob a store; simply blast the shopkeeper with his own merchandise (one shot from point blank range with a shotgun, or five shots from a pistol, will kill him) and take what you like. Be aware that killing a shopkeeper will make all shopkeepers hostile to you for the rest of the game, however.
- In general, if spending one or even two bombs or ropes will get you to an item crate, it's worth it; most crates will give you three bombs or ropes and the ones that don't are generally even more valuable. Spending one to acquire an idol or a very large quantity of gold is generally worthwhile as well if you aren't planning on angering the shopkeepers; you are very likely to find more in a shop and the cost of one bomb or rope is far less than the value of an idol even in Area 1. Spending up to three is likely to be worth it for rescuing a damsel, since health is in very short supply unless and until you get the kapala. Obviously all of these hints don't apply if you're running very low on the item; reducing yourself to one or zero bombs or ropes should be reserved for emergencies or damsels. In all cases, first make sure that there's no other way to get where you're looking.
- The climbing glove eliminates the use of ropes in certain situations by allowing you to climb up by moving towards the wall and repeatedly jumping.
Tips for Enemies and Traps
(More information about specific enemies and traps can be found in their articles.)
- Many enemies and traps must be triggered before they become dangerous. Learn what circumstances set off enemies and traps - how close to a frog you have to be before it'll jump at you, for example - so that you don't activate them before you're ready to deal with the consequences.
- If possible try to land on enemies to avoid fall damage. To master this technique you need be slightly familiar with enemies movement patterns. Avoid attempting to land on spiders or frogs by falling straight at them, come in from the side.
- Sacrificing live-but-stunned enemies on an altar wins you more favor than if you sacrifice dead ones, but keep in mind that enemies don't remain stunned for long. A Yeti who wakes up in your hands will immediately throw you, possibly to your death.
- When there are no items nearby to trigger a trap, you can consider using a bomb or rope to trigger it. Walk towards the edge while holding the item and once the animation for balancing yourself starts, you'll drop the item you were holding shortly - doing so will not activate the bomb or rope. You can also do a flip hang to drop the item without activating it. Be sure to pick it up afterward.
- Despite popular belief, it's not so hard to kill a shopkeeper as it seems - it just takes a bit of practice. There are many ways to do this; one recommended way is to climb to the top of a rope set up in the highest area of the keeper's shop, and set off a regular bomb from there. The hardest part of this method is knowing exactly when to drop the bomb. Note however: the bomb will always destroy most of the shop for you, and once it explodes items may be thrown randomly, sometimes, your way. However, to keep the shopkeeper from escaping (if he ever does by jumping around wildly), use your Webcannon to block the entrance before climbing the rope. Be sure there's plenty of space around you so that the bomb does not cause a glitch and stay with you, especially Sticky Bombs.
- Be careful around spikes. They are far more dangerous in version 1.1 than they used to be-- merely jumping is enough to get you killed.
- Whenever you whip a pot, whip it twice to make sure to kill any enemy that could be in it.
Tips for Specific Areas and Level Feelings
(More information about areas and level feelings can be found in their articles.)
- There are an abundance of Pots and Rocks in Area 1. Use this to your advantage, and never be without something to throw, whether it be at a Bat, a Spider, or an Arrow Trap. If the Big Chest is inaccessible, or you just aren't worried about the City of Gold, the Key makes an ideal thrown weapon, as it has the same range, trajectory, and damage as a rock, and cannot injure you if it happens to rebound into your face. The Flare has similar draws, but is destroyed by water, though this is only a factor in Area 2.
- Avoid all bone piles in a Restless Dead level. Area 2's high grass makes it difficult to distinguish between innocent skulls and lurking skeletons. Alternately, you can choose to shoot all the bone piles if you have a gun. The bullets will destroy all skulls, regardless of whether they are skeletons or not.
- If you find yourself with a surplus of bombs in a dark level, don't hesitate to make progress by bombing through the floor. It's often safer than confronting whatever hazards lie in the dark. (This especially holds true in Area 4, where the floors tend to be thin and the hazards deadly.)
- Don't crack open your box of flares on a dark level until you find yourself in a position where you need to see two places at once (a low floor for a jump, for example.)
- In Area 3, it is very common for unfortunate spelunkers to find themselves at the bottom of the level but nowhere near the exit, with very little way to reach it. Proceed downwards very carefully, trying your best never to go anywhere you can't get back from, and look down whenever possible. The compass is extremely valuable here, as are ropes and climbing gloves (and, of course, the jetpack).
- In Area 4, bombs can save you from having to traverse huge portions of a level, and lava is sometimes generated in a way that makes completing the level virtually impossible without either bombs, a cape or a jetpack. Since you will not need any bombs for the final boss, whenever you find yourself above a big room with a one-or-two tile high floor you should look down to determine if the exit is in that room and strongly consider just spending a bomb there, but don't spend your last bomb unless you have no choice or it will get you to the exit of level 15. Always look first, though, because only half of the rooms which are the right shape contain exits. Ropes are less valuable by this point, so if a bomb or a rope will accomplish the same task use the rope, but remember that ropes touching lava will burn.